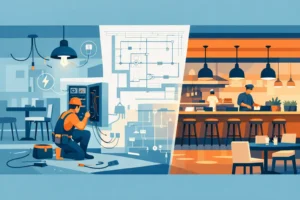
A restaurant electrical remodel example is most useful when it shows what actually changes behind the walls, above the ceiling, and at the service panel. New paint, booths, and a redesigned bar may get the attention, but electrical planning is what keeps the kitchen running, the dining room comfortable, and the reopening date from slipping.
For a Central Florida restaurant owner, the stakes are simple: downtime costs money. A remodel needs an electrical contractor who can identify the real load requirements, coordinate permits and inspections, and communicate clearly with the rest of the project team. No guesswork, no surprise charges, and no drama when the inspector is scheduled.
Restaurant Electrical Remodel Example: From Old Space to Working Restaurant
Consider a former quick-service restaurant in Kissimmee being converted into a 90-seat Latin fusion restaurant with a full cooking line, new bar, updated dining room, and patio seating. The existing building had an older electrical panel, fluorescent ceiling fixtures, a few wall outlets, and circuits that had been added over time without a clear labeling system.
The owner’s original plan seemed straightforward: replace the lights, add outlets at the bar, and connect new kitchen equipment. Once the electrical evaluation began, the scope changed for good reason. The new equipment package included electric fryers, refrigerated prep tables, a walk-in cooler, hood controls, ice machine, dishwasher, POS stations, undercounter bar refrigeration, exterior signage, and more lighting than the old space had ever supported.
The first job was not pulling wire. It was determining whether the existing service could safely carry the new restaurant load.
Step 1: Calculate the Real Electrical Demand
Restaurants do not use power evenly. The kitchen can ramp up quickly during prep and peak service. Refrigeration cycles on and off all day. The bar has its own equipment needs. Dining room lights, accent fixtures, music, POS equipment, and exterior lighting add up too.
In this example, the existing 200-amp service was evaluated against the proposed equipment schedule and building loads. The calculation showed that the service was close to its practical limit before several major pieces of kitchen equipment were even connected. Trying to make it work by squeezing more breakers into the existing panel would have created a short-term-looking fix with long-term risk.
The better path was a service and panel upgrade sized for the remodel and for reasonable future growth. That decision added cost upfront, but it prevented nuisance tripping, overloaded equipment, and the possibility of reopening only to discover the kitchen could not run at full capacity.
This is where a detailed walkthrough matters. Equipment cut sheets, nameplate ratings, voltage requirements, and manufacturer instructions are not paperwork to ignore. They determine circuit sizes, disconnects, receptacle types, and panel capacity.
Step 2: Build Dedicated Circuits Around the Kitchen Layout
The kitchen plan drove much of the electrical work. Each major appliance needed the right dedicated circuit, with receptacles and disconnects placed where staff could safely access them and where equipment could be serviced later. A restaurant kitchen is not the place for extension cords, overloaded power strips, or one circuit feeding multiple heavy loads because it was convenient during construction.
In this project, dedicated circuits were planned for the refrigeration equipment, ice machine, dishwasher, cooking equipment, hood-related controls, and prep equipment. GFCI protection was included where required, particularly around wet areas. The electrical layout also had to work with plumbing, HVAC ductwork, fire suppression components, wall finishes, and the equipment installer’s clearances.
There is always a trade-off here. Installing every possible outlet and circuit may increase the budget. Installing too little can force expensive changes after cabinets, tile, and stainless equipment are already in place. The practical answer is to plan for the actual operation of the restaurant, not just the opening-day layout. If the owner expects a second POS station, additional beverage equipment, or a patio service area within a year, it is usually less expensive to account for it during the remodel.
Step 3: Treat the Bar Like Its Own Work Area
Bars often get underestimated because the equipment is smaller than a commercial kitchen line. But a busy bar can need several dedicated circuits for ice machines, coolers, blenders, glass washers, beer system equipment, undercounter lighting, and POS hardware.
For this remodel, the bar had separate circuits for refrigeration and countertop equipment, plus properly placed receptacles for service staff. The team also included low-voltage pathways for POS and network cabling. Keeping power and communication work organized reduced the chance of a finished bar with nowhere clean to run a data line.
The owner also chose dimmable decorative lighting over the bar. That required compatible fixtures, controls, and dimmers. A lighting plan that looks good on a design board can flicker, buzz, or fail early if the components do not match. Details matter.
Lighting That Helps the Restaurant Work
Good restaurant lighting is more than style. It affects how customers read menus, how servers move through the dining room, how safe the kitchen feels, and how the building looks after dark.
The old fluorescent fixtures in this example provided flat, uneven light and used more energy than necessary. The remodel replaced them with LED fixtures designed for the task and the atmosphere: brighter, clean lighting in the kitchen and prep areas; comfortable general lighting in the dining room; focused fixtures at the bar; and exterior lighting for the entry and patio.
Lighting controls were divided into practical zones. The owner could set a different level for lunch service, dinner service, cleaning, and closing without turning the entire restaurant into one bright or dark box. Emergency and exit lighting were also addressed as part of the code-compliant plan, not left for the final week before inspection.
Exterior lighting deserves the same attention. Poorly lit entrances, walkways, and rear service areas create safety concerns and make a business look closed or neglected. In Central Florida, weather-rated fixtures, proper mounting, and durable connections matter because heat, rain, and humidity are hard on cheap materials.
Step 4: Plan for Permits, Inspections, and the Construction Schedule
A restaurant electrical remodel moves faster when electrical work is coordinated early. The electrician needs to know where the walls will be, when ceilings will remain open, when equipment arrives, and which work depends on inspection approval.
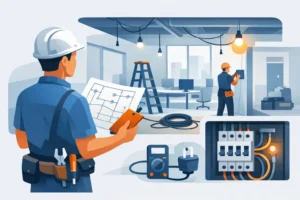
In this example, the project sequence included an initial evaluation, permit planning, rough-in work after demolition and framing, inspection coordination, final device and fixture installation, equipment connection, and final inspection. The electrical contractor also coordinated with the general contractor, hood contractor, plumber, HVAC team, and equipment supplier.
That coordination is not extra paperwork. It prevents conflicts like a new outlet landing behind a fixed cabinet, a conduit path blocked by ductwork, or an equipment delivery arriving before the required connection is ready. A missed detail can cost a day. A missed inspection can cost much more.
VoltIQ Electrical Contractor handles commercial electrical work with this kind of direct communication. You are talking to a local team that can explain the scope, provide upfront pricing before work begins, and coordinate permits and inspections without sending you through a call center.
Common Problems This Remodel Avoided
The finished project avoided several issues that show up often in restaurant renovations. The panel was not overloaded to save money on day one. Kitchen equipment did not share undersized circuits. The bar had power and low-voltage planning before finishes went in. Lighting was installed for how the restaurant operates, not just how it photographs.
It also avoided the expensive last-minute scramble that happens when an owner buys equipment without confirming electrical requirements. Before ordering a new appliance, confirm its voltage, amperage, plug or hardwire requirement, disconnect requirement, and installation instructions. “Commercial grade” does not tell you what the electrical system needs to provide.
Older spaces can add another variable. You may find abandoned wiring, mislabeled circuits, damaged junction boxes, or previous work that does not support a new build-out. A candid contractor will tell you what can stay, what needs correction, and what is optional for the current phase. Straight answers are better than a low number that grows after demolition.
What Restaurant Owners Should Bring to the First Electrical Walkthrough
A productive walkthrough starts with the equipment list and floor plan. Bring the kitchen layout, bar plan, appliance cut sheets, lighting selections if available, POS and network requirements, exterior sign information, and any future expansion ideas. Even rough documents are useful early on.
Be clear about your operating schedule and reopening target. If the restaurant must remain partially open during construction, that changes the approach. Work may need to be phased, temporary power may be needed, and noisy shutdowns may have to happen outside service hours. It costs more to work around an operating business, but closing completely can cost more depending on revenue and the remodel timeline.
The right restaurant electrical remodel is not about installing the most equipment or choosing the cheapest bid. It is about creating a safe, code-compliant system that supports the way your staff works every day. Start with the real load, plan the details before finishes go up, and give the electrical work enough room in the schedule to be done right.